Wednesday, March 13, 2013

Count Down to Earth Day: 40 Days

I'm bringing you one recycle craft idea each day until Earth Day, April 22nd.

Today's Idea:  Popsicle Stick Tramp Art

You may have thought that popsicle stick art was reserved only for kindergartners, but take a look at the fun and sophisticated creations below.  With warm weather in the forcast, popsicles might be on your shopping list.  Think twice before throwing those sticks in the trash.

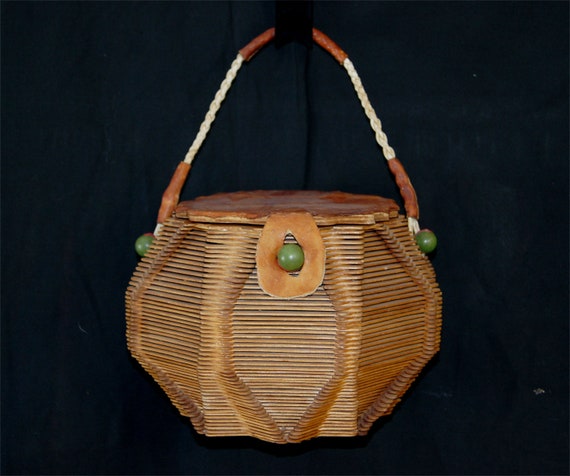
Vintage 1960s Folk Art Popsicle Stick Wood Basket Purse
Vintage Basket Purse
https://www.etsy.com/shop/snapitupvintage


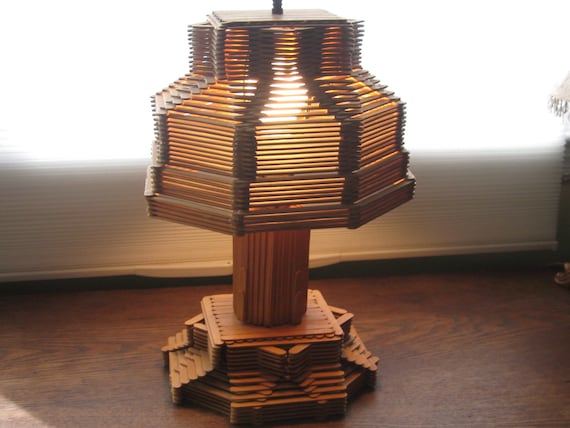
Vintage Tramp/Prison Art Popsicle Stick Lamp
 Vintage popsicle stick lamp
https://www.etsy.com/shop/StarLightMemories

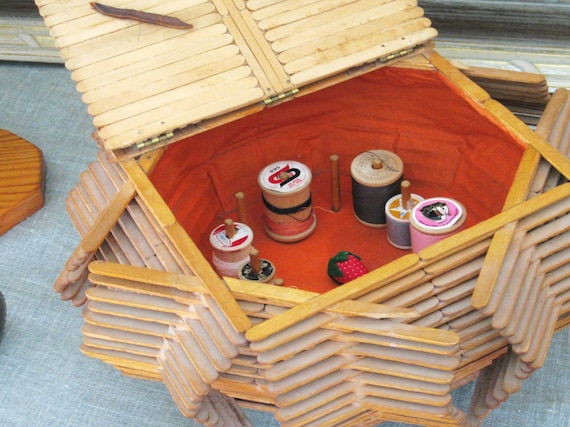
Vintage Popsicle Stick Sewing Basket - Cottage Life
Vintage Popsicle Stick Sewing Basket
https://www.etsy.com/shop/wilshepherd


Popsicle Stick Folk Art Lamp


popsicle stick side table.jpg
Popsicle stick table, lamps, sconce amd mirror frame by artist,  David Hrobowski

tree top half.jpg
Popsicle stick Christmas tree by David Hrobowski

Tune in tomorrow for another recycle craft idea.


Tuesday, March 12, 2013

Count Down to Earth Day: 41 Days

I'm offering one recycle craft idea each day until Earth Day.


Today's Idea:  Repurposed License Plates

Today's idea is not a single project, but a survey of objects made from old license plates to inspire you.  Anyone who's ever moved to a different state probably has an old license plate or two hanging around.  (I know I have several stashed in my garage that my husband and I have saved over the years.  I've just been looking for the right project.)  So I turned to Etsy for ideas.

PICK Your Initial KEY CHAIN - Recycled - Repurposed - Upcycled Initial License Plate Keychain Key Ring Key Fob Gift for Her Gift For Him
Initial Keychains by Brooke and Todd Theriot
 https://www.etsy.com/shop/KoolPlatez
 
 
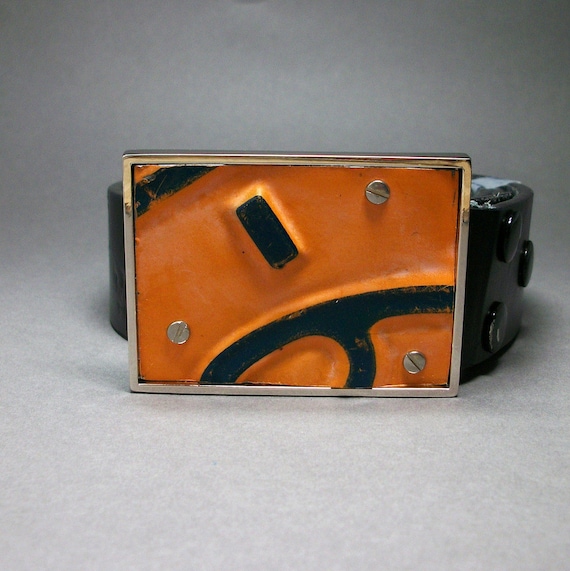
Recycled Belt Buckle License Plate New York Handmade Vintage for Him or Her
License Plate Belt Buckle by halfmoonroad
https://www.etsy.com/shop/halfmoonroad 


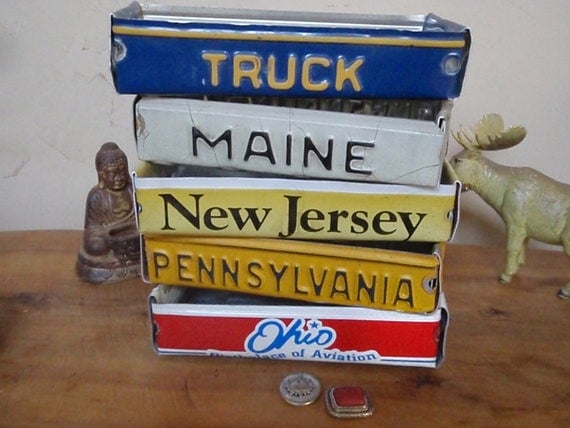
Maine License Plate Tray - Rustic Treasure Tray - Storage Box
License Plate Trays by lahaine
https://www.etsy.com/shop/lahaine


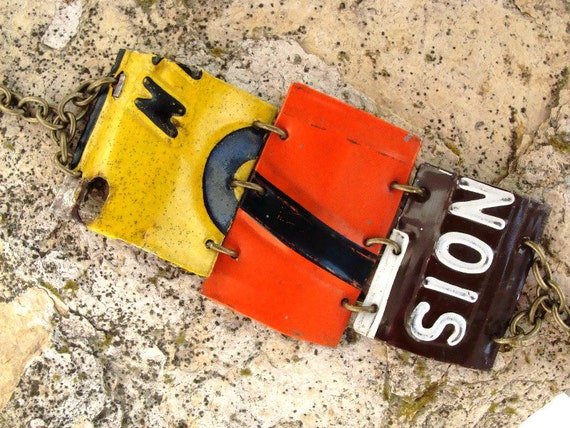
 Repurposed Vintage License Plates: Uber Punk Driving Cuff - Cuff Bracelet - ReaganJuel
Reagan Juel (see her interview on my blog from Feb.)
https://www.etsy.com/shop/ReaganJuel


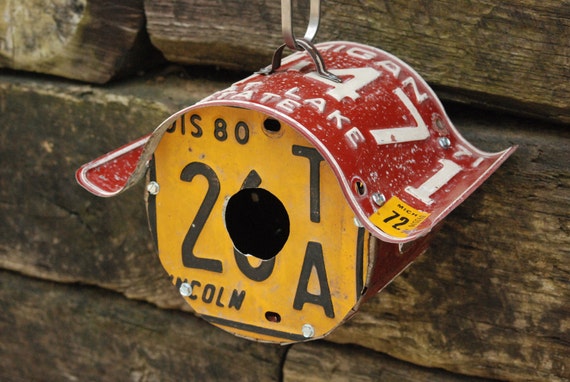
Flying Donut Round License Plate Recycled Birdhouse by StressTheSeams
License Plate Birdhouse by StressTheSeams
 https://www.etsy.com/shop/StressTheSeams

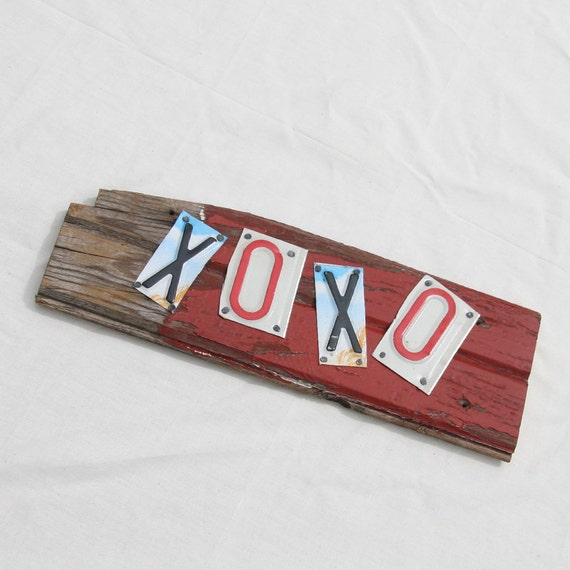
 XOXO Wedding Sign, Barn Wood
XOXO Wedding Sign by BarnDoorEvents
https://www.etsy.com/shop/BarnDoorEvents


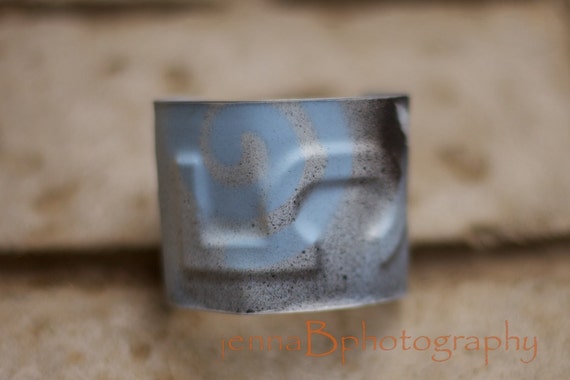
Glacier Cuff Bracelet - 5
Glacier Cuff Bracelet 5 by Jenna B
 https://www.etsy.com/shop/jennaBstudios


Peace sign in blue - License plate art
Peace Sign by ruraloriginals
https://www.etsy.com/shop/ruraloriginals

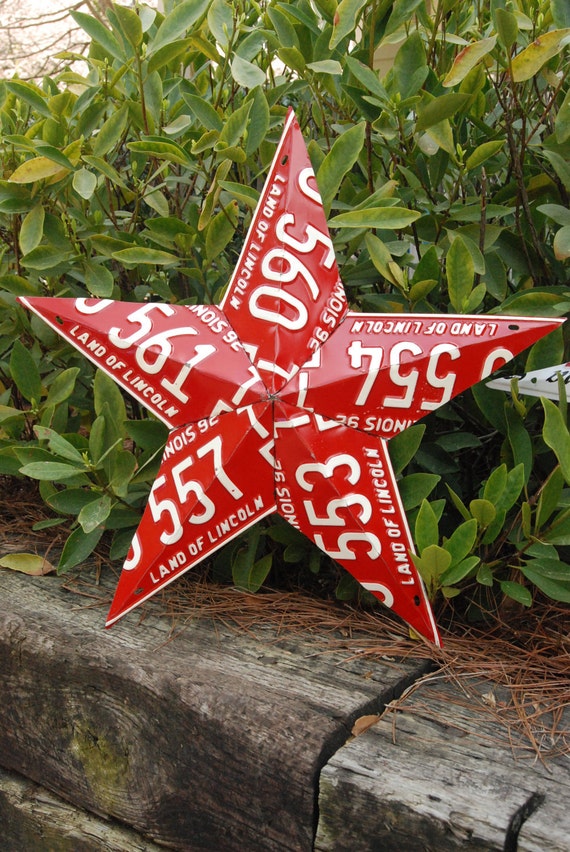
5 Point Recycled License Plate Star Decoration
5 Point Recycled License Plate Star Decoration by StressTheSeams
https://www.etsy.com/shop/StressTheSeams

Come back tomorrow for another recycle craft idea.


Monday, March 11, 2013

Count Down to Earth Day: 42 Days


I'm bringing you one recycle craft idea each day until Earth Day, April 22nd.

Today's Idea: Hooked Rag Rugs

Hooked rag rugs are a great way to recycle clothing and other textiles that may be ripped or stained.  This traditional craft hales from an era where little was ever wasted or thrown away.  Things were patched, repaired or repurposed.  Clothing and other textiles were patched until they could be patched no more, then were cut up to make quilts, rags or rag rugs.  Early American rag rugs were often true works of folk art, made by women who had no training as artists.  They were making something simple and utilitarian, but the medium invited personal expression.
    

There is nothing difficult about rug hooking, the only skill required is an abundance of patience.  Large rugs can take hundreds of hours to complete.  I love the tactile quality of hooked rag, so I've been experimenting with using it in my jewelry making.  A necklace, brooch or cuff bracelet is a manageable size that can be completed in a day.  You could also make a small wall hanging as a first foray into the art form.


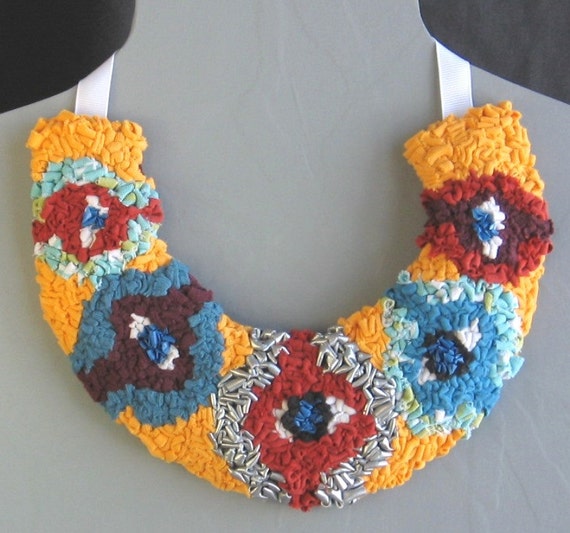
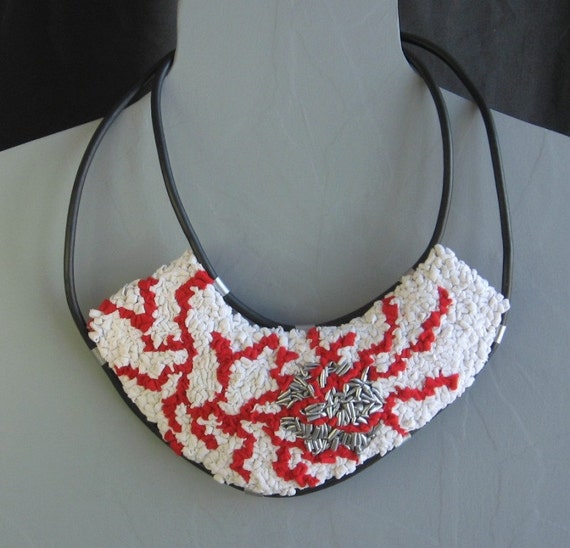
Folk Art Bib Necklace, collar, hooked rag, latch hooked, upcycled, evil eye protection, eyeball motif
My original design


Fiber Art Bib Necklace, collar, hooked rag rug, latch hooked, upcycled, recycled
My original design

My original design


What you will need to begin any project:
 
1) A latch hook tool.  This can be found at any craft store.
 
2) A piece of base fabric.  Traditionally this is burlap, a repurposed seed bag or coffee bag.  Burlap is inexpensive at a fabric store, but you can also use any sturdy loose-weave fabric such as linen.
 
3) The fabrics you will use  to hook your design.  These can be almost any salvaged textile that won't unravel as you work.  Traditionally, woven wool fabric was used.  I like to use t-shirts and other knits, cottons and cotton blends.  You can also incorporate other materials such as strings, yarns and plastic bags.  Different materials will give different textures.   I like to mix them up.  In the orange bib necklace pictured above, I have used t-shirts, rayon, a blue plastic bag, a printed heavy cotton pillow cover, chenille yarn and shiny silver pleather.  Cut your fabric into long 1/4" strips.  You don't need to measure or be too precise.  Just eyeball it.
 
4) A Sharpie marker for drawing your design on your base fabric.
 
5) White glue.  Elmer's type.  I use very inexpensive generic brands.  Glue is not critical, but I find it helpful to run a bead of white glue around the cut seam of the base fabric before you begin hooking.  Allow it to dry.  Then your base fabric will not fray or unravel as you are working.
 
To begin:


1) Sketch out your design and decide the colors you will use.
 

2) Draw your design on your base fabric using a Sharpie marker.   Cut out your design leaving at least a one inch border all around.  Put a thin bead of white glue around your cut edges and spread evenly with your finger.  Allow to dry completely.

 
3) With a small piece, it is sometimes helpful to use an embroidery hoop to hold your work.  This is optional.
Begin hooking.  Hold your strip of fabric on the back side of your burlap, insert your latch hook tool into the face of the design and draw loops of thread through to the front.  Keep your loops tight together but not so tightly packed that the base fabric becomes bowed and stretched.  Pull the ends of each strip of fabric through to the face and trim flush.  If you leave your ends on the back side and they get snagged or pulled they can potentially unravel large sections of hooking.
 
4) When you've finished hooking your design, you will want to finish it by turning the edges under.  A mist of water and a hot iron on the BACK of the piece will press it flat.  Neatly stitch a backing fabric to your piece.  If you've created an actual rug to be used on the floor, you can buy a liquid latex product from the craft store to paint on the back to keep it from unravelling and make it non-slip.
 
 
Come back tomorrow to see another recycle craft idea!


Sunday, March 10, 2013

Count Down To Earth Day: 43 Days

I'm bringing you one recycle craft idea each day until Earth Day.

Today's idea: 1000 Paper Cranes


An ancient Japenese legend has it that if a person folds 1000 paper origami cranes, he or she will be granted a wish.  Whether or not that is true, strings of origami cranes can liven up any room, porch or patio.  Make your paper cranes from any paper that's headed for the recycle bin, such as newspaper, magazine pages, junk mail, office paper, or book pages.
         

Below is a very good tutorial from Youtube for folding origami cranes.   


Tune in tomorrow for another recycle craft idea.


Saturday, March 9, 2013

Count Down To Earth Day: 44 Days

Earth Day is April 22nd.  I will try to bring you one inspiring recycle craft idea each day counting down to the big day.

Today's idea: Bottle Cap Curtain

Pinned Image


Bottle Top Curtain - Brunswick Street, Fitzroy


This one is a sculpture by El Anatsui


Bath room 1 Copy Bottle top bathroom curtain in plastics diy  with curtain Caps Bottle


Pinned Image


Pinned Image

I love it when creative people turn something so banal into something so beautiful!  As you can see, the possibilities are endless.  The simplest method requires no tools or special skills.  Simply crunch metal bottle caps around a length of twine.  Hang from a spring rod or dowel, or you could tack each sting individually above a door or window.

The plastic cap variety will require holes to be punched.  A drill will be most efficient.  String on any material you have available, or get fancy and connect with metal jump rings.  Start salvaging those bottle caps and see what you can create!


Saturday, March 2, 2013

GUEST ARTIST: JEN HARDWICK


" I love it when people tell me that my art makes them smile"


Collages hung at Old Portland Hardware, December, 2012

I had an email conversation today with artist Jen Hardwick of Seattle, Washington, who uses recycled elements to create playful, personality-filled assemblages.


So, Jen, what drew you to work with recycled materials?
Jen:  "I signed up to do my first group art show back in July 2011. At the time, I really wasn’t sure what I wanted to make but then I started looking through all the things I’d been collecting over the years and the ideas started coming."

What qualities do you think recycled materials bring to your work?
"I think they add whimsy and maybe nostalgia. I certainly have an appreciation for the way things were made 'back in the day.'  I feel that we live in such a throw away society that it inspires me to keep finding and collecting objects from an era when things were expected to last and be useful for years and years."
Paper Owl

What are your favorite recycled materials and where do you find them?
"There’s so many! I love watch parts, rulers, buttons and any kind of rusty metal. My wonderful dad loves to go to garage and estate sales and he brings me boxes of stuff. I also have a few salvage places I frequent and since I’ve been doing this awhile I have people who just give me stuff they find."


Cyclopean Goddess of Games
What other artists have inspired your work?
"When I was painting I was always inspired by the classic artists: Picasso, Van Gogh, Klimt. I certainly take from them when it comes to color. I’ve discovered some local artists, Terry Turrell and Alden Mason. Their work is very inspiring to me. I’ve made contact with other artists through social media and it’s fascinating to see what comes out of someone else’s mind."  [Link to works by Terry Turrell;  Link to works by Alden Mason]

Do you have formal training as an artist or are you self-taught?
"I’m self- taught. Art has been a part of my life from a very young age. I’ve worked in many different mediums: watercolors, oil and acrylic paints, pastels, pen & ink, pencil drawings and paper. I always thought I would be a painter but since I started making these collages I feel like this is what I’m meant to do."

Steampunk Bug

As a mom, how do you find time to create?
"It’s difficult. It definitely takes some balancing and time management. There are days when all I want to do is sit at my table and create but family comes first. I try to take some time each day to do some prep work and then when my son is away visiting the grandparents, that’s when I get my creative time. My son is also starting to make collages and it’s very fun to share that time with him."

Besides Etsy, are there other venues where your art is featured?
I have a flickr page @ flickr.com/photos/redheadhardwick/ and my professional website -- jen-hardwick.com -- has a complete catalog of all my collages.


Visit Jen's Etsy shop to see more of her wonderful creations: